Introduction
Your windshield does much more than protect you from wind, rain, dust, and road debris. It also contributes to your vehicle's structural strength, helps maintain proper airbag performance, and provides a clear view of the road. After a windshield repair or replacement, checking the work carefully can help you identify potential problems before they affect your safety or driving experience.
A repaired windshield should provide a stable, clear surface with the damage properly addressed. A replacement windshield should fit securely, seal against water and air, and support any driver-assistance systems that depend on the glass or a windshield-mounted camera. The adhesive used during installation must also have enough time to cure before the vehicle is driven.
Knowing what to inspect after auto glass service can give you greater confidence in the work and help you recognize when something needs professional attention. Some checks are simple enough to perform in your driveway, while others, such as ADAS and lane-departure camera calibration and adhesive bonding verification, require trained technicians and appropriate equipment.
This guide explains what to check after windshield repair or replacement, which warning signs deserve attention, how long to wait before driving, and what to do if something does not seem right.
1. Check Your Windshield for Clear Visibility
The first thing to inspect after any windshield service is your view of the road. Clear visibility is essential for recognizing traffic signals, judging distances, spotting pedestrians, and responding to changing road conditions.
Inspect the repaired area
After a rock chip or small crack has been repaired, examine the treated area from both inside and outside the vehicle, provided the technician has confirmed it is safe to do so.
A successful windshield chip and crack repair often makes the damage less noticeable, but it may not make the glass look completely new. Resin fills the damaged area to help restore the glass's integrity and reduce the likelihood of further spreading. Depending on the original impact, a small blemish or outline may remain.
Look for these signs:
The damaged area appears filled rather than open or hollow.
There are no obvious new cracks extending from the original impact.
Your view through the repaired area is not distracting during normal driving.
The repair has not introduced a new visible defect.
If the chip remains noticeable, that alone does not mean the repair failed. Ask the technician to explain the expected cosmetic result and whether the damage is structurally suitable for repair.
Check for visual distortion
Look through the windshield at a straight line, such as a building edge or road marking, while the vehicle is parked. The line should not appear unexpectedly warped or wavy in your normal viewing area.
Some optical distortion can occur around certain windshield areas or with particular glass designs. However, pronounced distortion that interferes with your view deserves professional inspection.
Safety tip: If the windshield causes distracting visual distortion, do not assume your eyes will adjust to it. Contact the installer before continuing normal driving.
2. Inspect the Windshield Glass for Cracks, Chips, and Defects
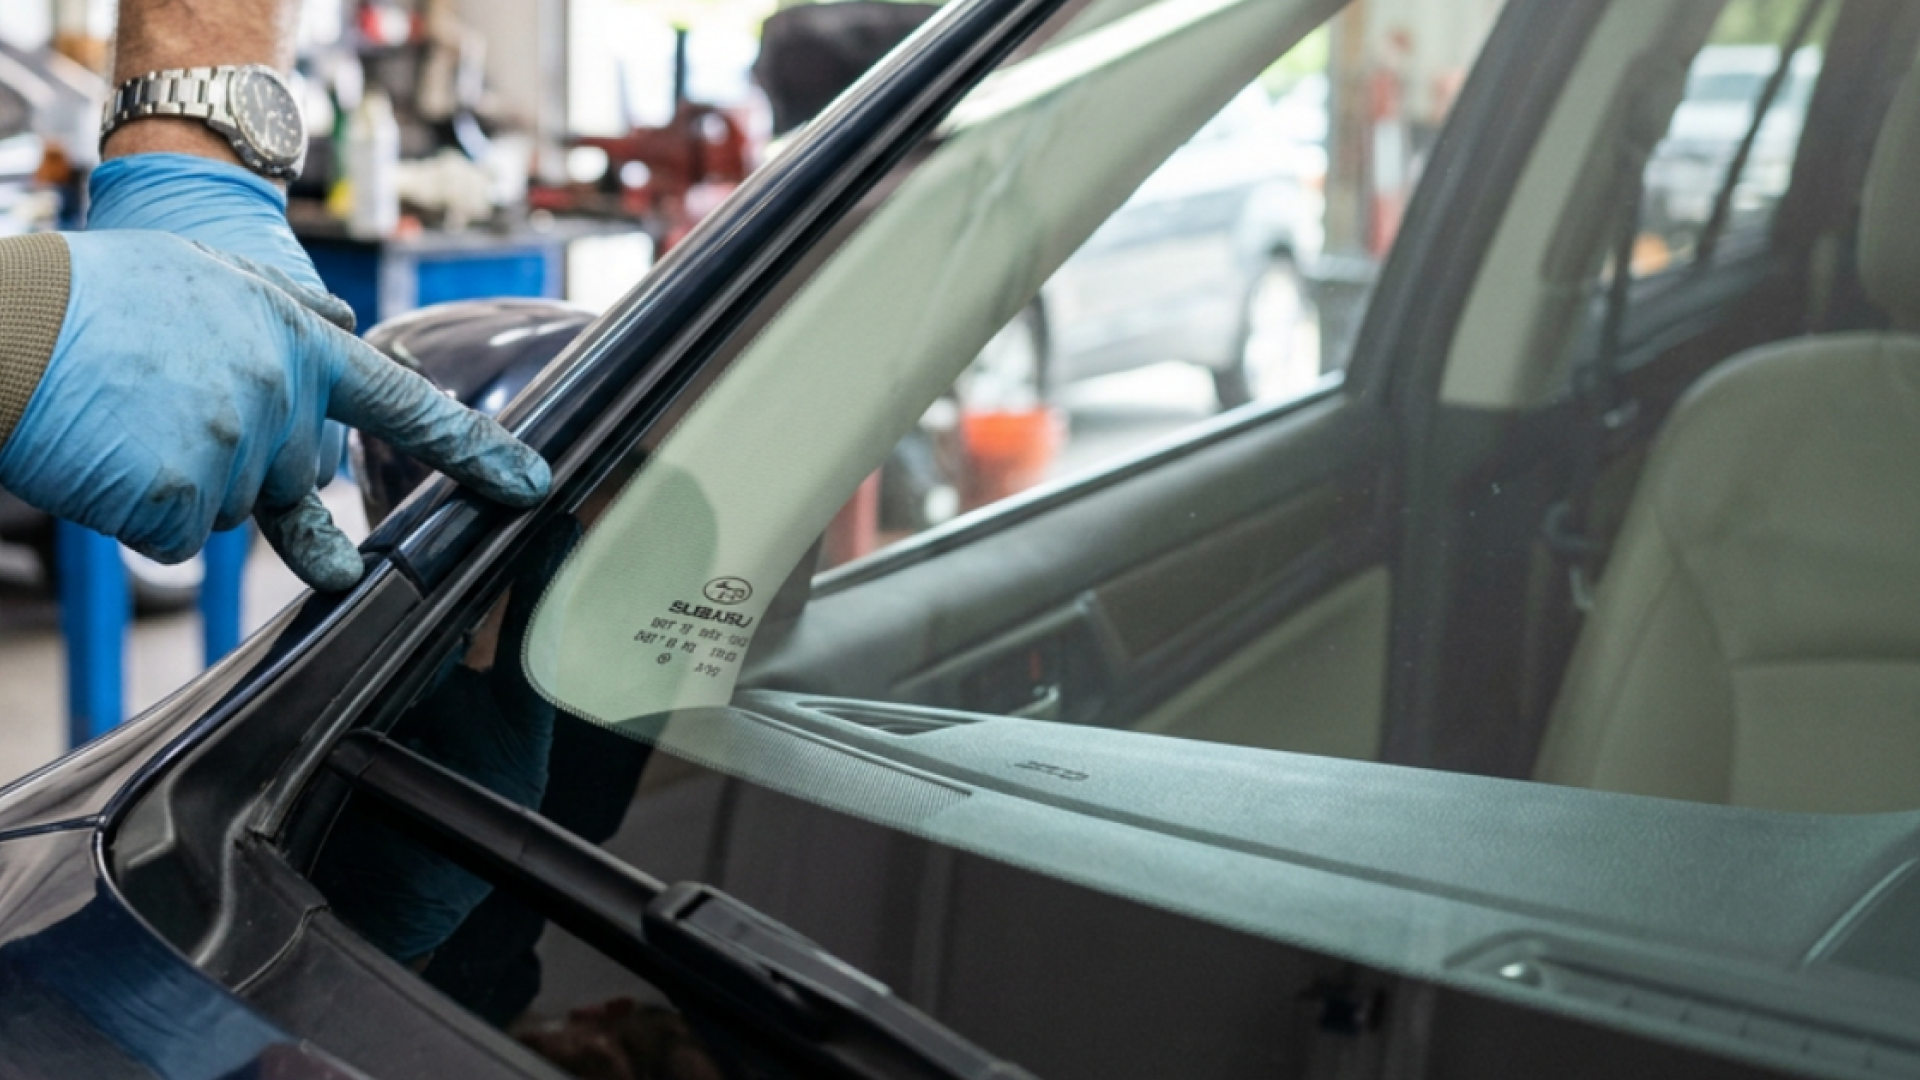
After a windshield replacement, examine the new glass for visible damage, imperfections, or signs that it may have been affected during installation or handling.
Look for new chips or cracks
Walk around the vehicle and inspect the windshield in good lighting. Pay particular attention to the edges, corners, and areas near the windshield-mounted camera or sensors.
Check for:
New chips or cracks that were not present before service.
Scratches or surface marks that interfere with visibility.
Noticeable defects around the glass edges.
Damage near camera mounting areas.
Glass that appears unevenly positioned in the frame.
Small marks can sometimes be difficult to distinguish from reflections, dust, or manufacturing features. If you see something suspicious, take a clear photograph and ask the auto glass technician to assess it.
Check the glass fit
The windshield should sit evenly within the vehicle's opening, with consistent positioning relative to the surrounding bodywork and trim.
You should not see an obvious gap on one side, a raised corner, or a section that appears out of alignment. However, different vehicle designs use different trim and molding arrangements, so appearance alone cannot confirm whether the glass is installed correctly.
A professional inspection is the right next step if the windshield looks crooked, the molding is lifting, or the glass appears to sit differently from its original position.
3. Inspect the Windshield Seal for Water and Air Leaks
The seal around a replacement windshield helps keep rain, wind, and outside contaminants from entering the cabin. The adhesive system also bonds the glass to the vehicle's body, making correct installation essential.
Look for signs of water intrusion
After the installer says it is safe to expose the vehicle to water, watch for moisture around the windshield's interior edges during normal rain or an appropriate water test.
Warning signs include:
Water droplets forming near the windshield pillars.
Damp headliner material near the front corners.
Moisture around the dashboard or windshield base.
Wet carpeting near the front footwells without another obvious explanation.
A musty smell that develops after rain.
Not every leak near the windshield originates from the glass installation. Sunroof drains, door seals, and other body openings can also allow water into a vehicle. A technician can help identify the source rather than relying on guesswork.
Listen for unusual wind noise
After replacement, listen for new whistling, rushing air, or unusual noise around the windshield while driving under normal conditions.
A dramatic increase in wind noise may indicate an issue with the glass positioning, molding, or seal. It can also come from another source, such as a door seal or exterior trim.
Do not press, pull, or push on the windshield to test the bond. If you suspect a leak or installation problem, contact the installer and describe when the noise occurs.
4. Confirm That the Windshield Adhesive Has Cured Enough
One of the most important checks after windshield replacement is confirming that the vehicle is safe to drive.
Replacement windshields are commonly installed using a specialized automotive windshield replacement adhesives system. This adhesive bonds the glass to the vehicle's frame and contributes to the windshield's role in maintaining cabin structure during a collision.
Follow the safe-drive-away time
The safe-drive-away time is the minimum period the installer specifies before the vehicle can be driven after windshield installation. It depends on the adhesive product, environmental conditions, and other factors.
Temperature, humidity, and the vehicle's design can influence curing. The correct waiting period should come from the technician using the specific adhesive system, not from a general estimate found online.
Before leaving the shop, ask:
How long must I wait before driving?
Are there any restrictions during the initial curing period?
When can I wash the vehicle?
When can I remove any installation tape?
Are there special instructions for my vehicle?
Do not shorten the waiting period simply because the glass feels firm or looks securely installed.
Avoid disturbing the installation
Depending on the installer’s instructions, you may need to leave retention tape in place, avoid high-pressure car washes, or limit activities that place unnecessary stress on the new seal.
Follow the instructions provided for your specific vehicle and adhesive. Do not remove tape or press against the molding unless the technician says it is appropriate.
Remember: A windshield can look properly installed before its adhesive has reached the strength required for safe driving. Visual inspection cannot replace the manufacturer's curing requirements.
5. Check the Windshield Wipers and Washer System
Windshield service can involve removing or repositioning wiper arms, cowl panels, trim, or other components near the base of the glass. Checking the wipers afterward can help reveal problems before you encounter rain.
Test the wipers while parked
Once the vehicle is ready for testing, operate the washer system and wipers. Confirm that the blades move smoothly and return to their normal resting position.
Look for:
Wipers that skip, chatter, or leave broad unwiped areas.
Blades that strike the windshield molding.
Wiper arms that appear misaligned.
Washer fluid that fails to spray correctly.
Unusual noises during operation.
A poor wiping pattern may result from worn blades rather than the windshield installation. Still, if the problem began immediately after service, tell the installer so the cause can be checked.
Check the cowl and surrounding trim
The plastic panel at the bottom of the windshield is often called the cowl. Depending on the vehicle, it may need to be removed or moved during replacement.
Make sure the surrounding components appear properly seated. A loose panel can create noise, vibrate, or allow water to drain incorrectly.
Avoid attempting to force trim back into place. Clips can break, and some components require a specific installation sequence.
6. Verify ADAS and Windshield Camera Calibration
Modern vehicles may use windshield-mounted cameras and other sensors to support advanced driver-assistance systems, commonly known as ADAS.
These systems can support features such as lane-departure warnings, lane-keeping assistance, forward collision alerts, and automatic emergency braking. Depending on the vehicle, the camera may look through the windshield to interpret lane markings, vehicles, and obstacles.
Replacing the windshield can change the camera's position or optical relationship with the road. As a result, certain vehicles require adas calibration mistakes that can affect vehicle safety features to be avoided through professional service.
Ask whether calibration was required
Calibration requirements depend on the vehicle manufacturer's procedures, the system design, and the work performed. Not every vehicle has the same equipment or needs the same calibration process.
Ask the technician:
Does my vehicle require windshield camera calibration?
Was static calibration, dynamic calibration, or another prescribed procedure completed?
Was the system checked after calibration?
Is there documentation of the completed work?
Static calibration generally uses a controlled setup with targets and specialized equipment. Dynamic calibration involves driving under specified conditions so the system can complete its procedure. Some vehicles require a combination or other manufacturer-specific steps.
Check for warning lights and system messages
After service, start the vehicle and look for dashboard warnings related to driver-assistance systems, cameras, or sensors.
If your vehicle displays a warning that was not present before the work, contact the installer promptly. A missing warning light does not, by itself, prove that calibration was completed correctly.
Until any calibration concern is resolved, do not rely on affected driver-assistance features. Follow the vehicle manufacturer's guidance and remain responsible for steering, braking, and monitoring traffic.
Practical example: If your lane-departure warning worked before a windshield replacement but no longer responds normally, the issue could involve calibration, a camera obstruction, or another system fault. It should be diagnosed rather than dismissed as a minor inconvenience.
7. Inspect Interior Trim and Exterior Molding
Windshield replacement may require removing trim panels, clips, molding, or components around the rearview mirror. These parts should be reinstalled correctly to preserve their intended fit and function.
Examine the interior
Look around the windshield pillars, headliner, dashboard edge, and rearview mirror area.
Check for loose panels, hanging wires, missing covers, exposed clips, or trim that no longer sits flush. If your vehicle has a rain sensor, humidity sensor, or camera behind the windshield, confirm that the surrounding cover appears properly fitted.
Some components are designed differently across vehicle models, so a slight difference in appearance does not automatically mean something is wrong. Raise any obvious change with the technician.
Check the exterior molding
The exterior molding should appear appropriately seated around the windshield. Look for sections that are lifted, loose, twisted, or visibly separated from adjacent trim.
Do not pull on the molding to see whether it moves. The proper way to assess installation depends on the vehicle's design and the materials used.
A well-fitted appearance is reassuring, but the actual adhesive bond and structural integrity must be assessed using proper installation procedures.
8. Check for Interior Cleanliness and Glass Debris
Windshield repair and replacement can produce small amounts of residue or debris, particularly when broken glass is involved. A final cleanup check helps ensure the cabin is comfortable and safe.
Inspect the dashboard, front seats, floor mats, and nearby vents for glass fragments, dust, adhesive residue, or fingerprints that interfere with visibility.
If the windshield was shattered, carefully check the surrounding cabin areas where fragments may have fallen. Avoid running your hands across carpet or upholstery to search for tiny pieces.
Look for obstructed vents and controls
Confirm that nearby air vents, defroster outlets, mirror controls, and other accessible features operate normally. A properly functioning defroster is especially useful because condensation can quickly reduce visibility in cold or humid conditions.
If the glass was replaced, check that any required inspection stickers, registration decals, or toll tags have been handled according to local requirements and the relevant service instructions.
Do not apply household cleaners, abrasive pads, or unapproved chemicals to newly installed glass or surrounding trim. Ask the installer which products are suitable.
9. Understand the Difference Between Windshield Repair and Replacement Checks
The checks you should perform depend partly on whether the technician repaired the existing windshield or installed new glass.
After windshield chip or crack repair
A repair typically involves injecting resin into eligible damage and curing it. The technician aims to improve the damaged area's integrity and limit further spreading.
After repair, check:
Whether the damaged area appears filled.
Whether the repair leaves distracting visual distortion.
Whether any crack has visibly extended.
Whether the technician explained the expected cosmetic result.
Whether you received instructions about care or follow-up.
Not every crack or chip can be repaired safely. Damage in the driver's primary viewing area, extensive cracking, or damage reaching the windshield edge may require replacement depending on the vehicle and repair criteria.
After windshield replacement
Replacement involves removing the damaged glass, preparing the opening, installing new glass, and bonding it with the appropriate adhesive.
In addition to visibility checks, pay attention to:
Glass fit and alignment.
Adhesive curing and safe-drive-away instructions.
Water and wind leaks.
Wiper operation and surrounding trim.
ADAS calibration requirements.
Documentation and warranty coverage.
A replacement involves more installation steps than a typical chip repair, so it warrants a broader inspection.
10. Take a Short, Careful Test Drive When It Is Safe
Once the technician confirms the vehicle is safe to drive, a short test drive can help you notice issues that are difficult to detect while parked.
Choose a familiar route with reasonable traffic and good visibility. Do not conduct tests that require sudden braking, aggressive maneuvers, or deliberate reliance on driver-assistance features.
During the drive, pay attention to new wind noise, unusual vibration, visibility problems, and any dashboard alerts. If the vehicle feels or sounds noticeably different, arrange an inspection rather than assuming the changes are normal.
Do not use a test drive to determine whether the windshield adhesive has cured sufficiently. The required safe-drive-away time must be confirmed before driving.
11. Know What to Do If Something Seems Wrong
You do not need to determine the technical cause of every problem yourself. Your job is to recognize a change, document it, and contact the appropriate professional.
Document the concern
Take photographs of visible defects, loose molding, or moisture. Record when you noticed the problem and whether it occurs during rain, at particular speeds, or when operating a vehicle feature.
Keep your invoice, warranty information, and any calibration documentation. These records can help the technician understand the work completed and determine the appropriate next step.
Contact the installer promptly
Describe the problem clearly and ask whether the vehicle needs an inspection. If you notice water intrusion, new cracking, significant distortion, or an ADAS warning, avoid delaying the conversation.
Stop driving if the windshield obstructs your view, the glass appears unstable, or another condition makes the vehicle unsafe. If necessary, arrange professional assistance or towing.
Do not attempt to reseal the windshield with household silicone or other products. Improvised repairs may interfere with the proper bonding system and make professional correction more difficult.
Review your warranty and insurance paperwork
Warranty terms vary according to the service provider, materials, and type of work. Review the documentation to understand what is covered and how to report a concern.
If insurance paid for the service, retain relevant claim and repair records. Ask your insurer or installer about any additional paperwork needed if the glass requires further work.
12. Prevent Future Windshield Problems
After your windshield has been repaired or replaced, a few sensible habits can help preserve visibility and reduce the risk of avoidable damage.
Keep a safe following distance behind trucks and other vehicles that may throw up road debris. Avoid slamming doors unnecessarily when the vehicle manufacturer's or installer's care instructions advise against it during the initial curing period.
Replace worn wiper blades when they begin streaking or damaging visibility. Clean the windshield with suitable automotive glass products, and avoid scraping aggressively around repaired areas.
Address new rock chips promptly. A small chip can spread as the glass experiences temperature changes, road vibration, or vehicle-body movement. Whether it can be repaired depends on its size, location, depth, and condition.
For drivers who frequently encounter gravel, highway debris, or other sources of impact damage, windshield protection products such as ExoShield windshield protection may also be worth discussing with an auto glass professional. Products like ExoShield are designed to provide an additional layer of protection, but they do not make a windshield immune to damage.
If your vehicle has a camera-based driver-assistance system, follow the manufacturer's guidance regarding windshield coatings, films, and other products that may affect camera visibility or system performance.
Conclusion
Checking your windshield after repair or replacement is a straightforward way to identify concerns before they become more serious. Start with clear visibility and visible glass defects, then inspect the surrounding seal, molding, wipers, interior trim, and any signs of water or air leaks.
After replacement, pay particular attention to the adhesive's safe-drive-away time and whether your vehicle requires ADAS camera calibration. These are technical safety considerations that cannot be confirmed through appearance alone.
If you notice unusual distortion, new cracks, moisture, wind noise, loose trim, or driver-assistance warnings, contact your auto glass professional and explain what changed. Keep your service records and follow the specific care instructions provided for your vehicle.
Rock Doc Auto Glass serves customers across Utah with windshield repair and replacement, rock chip and crack repair, ADAS and lane-departure camera calibration, motorhome and rv glass and windshields, and ExoShield windshield protection. With mobile service and in-shop appointments available, drivers can discuss their auto glass faqs and determine the appropriate next step.
A careful post-service check, combined with qualified installation and proper follow-up, helps you maintain clear visibility and confidence on the road.
Frequently Asked Questions
1. How soon can I drive my car after windshield replacement?
You can drive once the installer confirms that the adhesive has reached its specified safe-drive-away time. The waiting period depends on the adhesive, temperature, humidity, and vehicle requirements. Always follow the technician's instructions rather than relying on a general time estimate.
2. How can I tell if my windshield replacement was done correctly?
Check for clear visibility, even glass positioning, properly seated trim, and the absence of obvious water leaks or unusual wind noise. Also confirm that any required ADAS calibration was completed. A visual inspection alone cannot establish that the adhesive bond is structurally sound.
3. Is it normal to see a mark after windshield chip repair?
Yes. A repaired chip may remain faintly visible because resin cannot always restore the glass's original appearance completely. The goal is to address suitable damage and reduce the risk of spreading. Ask the technician whether the remaining mark is consistent with the expected result.
4. How do I know if my windshield is leaking after replacement?
Look for unexplained moisture near the windshield edges, damp headliner material, or new wind noise while driving. A professional can inspect the seal and determine whether the windshield or another part of the vehicle is allowing water or air inside.
5. Does windshield replacement require ADAS camera calibration?
Some vehicles require calibration after windshield replacement because the work can affect the position or optical relationship of a windshield-mounted camera. Requirements vary by make, model, and system. Ask the installer to confirm the manufacturer's procedure and provide documentation when applicable.
6. What should I do if my windshield looks distorted after replacement?
Contact the installer and describe where the distortion occurs and whether it affects your normal view of the road. Do not assume you will adjust to the change. If visibility is significantly impaired, avoid driving until the issue has been assessed.
7. Can I wash my car after windshield replacement?
Follow the installer's instructions about washing, especially during the initial adhesive-curing period. The appropriate waiting time and restrictions can vary by adhesive and installation conditions. Avoid high-pressure washing or disturbing installation tape until the technician confirms it is safe.
8. What should I do if I hear wind noise after windshield replacement?
Contact the installer if the noise is new or noticeably different. It may involve the windshield molding, seal, door seals, or another component. Describe the speed and conditions under which the sound occurs, and arrange an inspection rather than attempting to reseal the glass yourself.
9. Should I return to the installer if my windshield develops another crack?
Yes. Contact the installer promptly and explain where the crack appeared and when you noticed it. A new crack may result from fresh impact damage, existing damage spreading, or another issue. A technician can inspect it and determine whether repair or replacement is appropriate.
10. What warranty should I expect after windshield repair or replacement?
Warranty coverage varies by provider and service. It may address specified workmanship issues or other conditions described in the written terms, but coverage is not identical everywhere. Review your paperwork and ask the installer how to report a concern, what exclusions apply, and whether follow-up inspection is available.